Getting Started with the Impatica Screen Projection for Windows Mobile
 The following steps are provided to help get you started projecting your Windows Mobile handheld's screen contents with your ShowMate. For complete instructions on how to use your ShowMate, please refer to the ShowMate User's Manual. You may also download a PDF version of these Getting Started instructions for future reference.
1. Install Screen Projection Application on your Windows Mobile handheld
The Impatica Screen Projector application must be installed on your Windows Mobile handheld before you may project the home screen through the ShowMate. To install it, either:
On your Windows XP or earlier PC:
- Please ensure your PC has Microsoft ActiveSync software installed and is currently running. This software is required to interact with mobile devices from computers running Windows XP or earlier. It can be downloaded from the Microsoft web site;
- Download the Impatica Screen Projector installer;
- Connect your Windows Mobile handheld to your PC using the USB cable provided with your device and double-click the ImpaticaProjector.msi file to install the application on your handheld;
- Follow any instructions that appear in order to complete the installation.
On your Windows Vista PC:
- Please ensure your PC has Windows Mobile Device Center software installed and is currently running. This software is required to interact with mobile devices from computers running Windows Vista. It can be downloaded from the Microsoft web site;
- Download the Impatica Screen Projector zip file;
- Unzip the contents to a folder on your PC;
- Connect your Windows Mobile handheld to your PC using the USB cable provided with your device and double-click the setup.exe file to install the viewer on your handheld;
- Follow any instructions that appear in order to complete the installation.
On your Windows Mobile handheld:
- Get the ImpaticaProjector.cab file at
ImpaticaProjector.CAB through the browser and download it directly to the handheld. Select the cab file to start the installation.
2. Upgrade the ShowMate Firmware
To use the Screen Projector application, the ShowMate must have firmware 2.3.5 or later. To determine whether your ShowMate has the proper firmware version installed, connect your ShowMate to a power source and display. The ShowMate splash screen will appear, displaying the version of the firmware currently installed. If the version number is not 2.3.5 or higher, use the ShowMate updater software as follows.
- Installation
- Download the most recent Impatica ShowMate Updater;
- Unzip the Updater package to an appropriate folder on your computer.
- Installation of ShowMate Driver
- Connect the ShowMate Power Input Port to the Windows computer with the USB cable provided
- The first time you plug the ShowMate into a computer using a standard USB port, Windows should report that it has found new hardware and will launch the hardware wizard
- If Windows did not detect the new hardware, then right-click "My Computer" and choose "Properties". Within the System Properties dialog box, click on the "Hardware" tab. Click the "Device Manager" button
- Navigate to the "Driver" folder that was extracted from the Updater zip file. Note: You must extract the contents of the zip package before completing this step. Using the files while they are still in the zip package will not work
- Once the "Driver" folder is selected, Windows should find the driver (file name: gser.inf) for the ShowMate. You may be prompted with a warning that states the driver has not passed Windows certification. Click "OK" to continue. If you get prompted but you are not presented with the option to click "OK" then do the following:
- Cancel the driver installation process
- Right-click "My Computer" and choose "Properties". Within the System Properties dialog box, click on the "Hardware" tab
- Click on the "Driver Signing" button
- In the resulting dialog box, select the "Warn" option
- Click "OK"
- Follow the driver installation instructions above again.
- Updating ShowMate
Once the ShowMate driver is installed, proceed with the following steps:- Disconnect and re-connect the ShowMate Power Input Port to the Windows computer with the USB cable provided
- The yellow light on the ShowMate will illuminate, then flash three times to indicate that it is ready to be updated. Wait for this to occur or for the splash screen to be displayed (if connected to a projector or display device) before proceeding
- Launch the ShowMate updater application by double-clicking "ShowMateUpdater-###.exe" file located in the "Updater" folder where the updater package was unzipped
- In the window that appears, the current version of your ShowMate firmware and the version of the firmware included in the updater are displayed. To begin the updating process, click Update
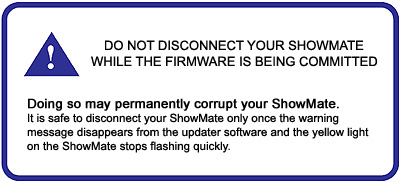
- The updating process will begin. First the new firmware will be transferred to the ShowMate. You will see progress bars during this time. Next, the new firmware will be committed to the ShowMate. During this time, the software will warn you not to disconnect your ShowMate.

The updater software will indicate that the update is complete. At this time, you may disconnect your ShowMate and close the Updater application.
3. Project your Windows Mobile Screen
To start projecting your Windows Mobile screen, first connect your ShowMate to the projector or display and to a power supply
- Use a VGA cable to connect your ShowMate to your projector or display;
- Use the ShowMate power charger to plug your ShowMate into a power outlet;
- Wait for the ShowMate splash screen to appear.
Then, on the Windows Mobile handheld:
- Ensure that Bluetooth connections have been enabled for your handheld
- Launch the Impatica Screen Projector application
- Have the ShowMate powered on and connected to the display via VGA (you should see the splash screen);
- Launch the Impatica Projector application;
- Add the ShowMate to the list of known ShowMate devices by selecting 'New ShowMate'. If it is already in the list, skip to step 8;
- Your ShowMate should be found (identified by the last 6 digits of the serial number);
- Select your ShowMate and when prompted, enter the 4 digit pin number (which is the first 4 digits of the serial number, not including the NN-IM- portion)

- This should return you to the same screen as before, only now your ShowMate is in the list;
- Select your ShowMate from the list;
- This will start the capturing. A progress bar will appear and move across the screen continuously;
- Simply use any other application as you would normally. DO NOT cancel or close the capturing dialog. You can minimize it if required. The application should minimize on its own;
- When you are finished projecting, select the Impatica Screen Projector application icon again. You will be presented with a "Confirm" dialog box asking if you would like to stop projecting. Select "OK" to stop projecting or "Cancel" to continue projecting.
Additional Resources
Windows Mobile handheld Requirements
- Windows Mobile handheld® handheld with Windows Mobile handheld software 4.3 or later
- Windows Mobile handheld® handheld with Windows Mobile handheld software 4.2.2 or higher is supported in a beta build of the software. To receive this version, please contact Impatica Customer Support.
Other Requirements
- Projector or other display with VGA input
- PC with Windows 98/ME/NT/2000/XP/Vista (32 bit) to perform firmware upgrades when necessary
Questions about Impatica ShowMate?
Email Impatica Customer Support or call:
- In North America: (800) 548-3475
- Outside North America: (613) 736-9982
